![]()
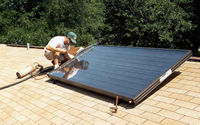
 This site presents the steps taken in the installation of a particular solar water heating system. The system being installed is a system that uses a flat-plate solar collector, a differential controller, several sensors, a pump, and various plumbing valves. Although representative of a basic solar system installation, variations can occur. For example, the system chronicled at this site was installed on a shingled roof. Systems installed on tile roof would require a different type of roof mounting method.
For a in-depth description of this and other types of solar system and their components used in Florida, please see the System Types section.
The installation of a solar system requires skills that overlap many trades. Installers must be familiar with plumbing, roofing, and electrical trade tasks. In addition, there are numerous tasks that are specific to the solar industry. This photographic chronology of a solar water heating system installation will highlight the various tasks and processes included in a proper solar system installation.
The installation steps chronicled for this presentation were conducted by All Solar Power in Tampa and All Solar Systems in Hallandale, Florida. Special thanks to Richard Lavigne and Dave Eddington.
This installation presentation will be divided into several pages. The list below is presented in chronological order from installation start to finish. Each listing is on a separate page.
- 1. Collector Mounting
- 2. Roof Pipe Flashing
- 3. Piping From Tank To Collector
- 4. Collector Feed Line Piping
- 5. Collector Return Line Plumbing
- 6. Storage Tank
- 7. Controller and Sensors
- 8. Pump and Valves
- 9. Pipe Insulation
- 10. Final Checkout
