

![]()
This section outlines the tasks involved in connecting the solar pool heating system piping.
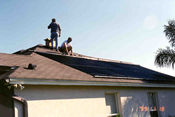 |
Once the collectors have been securely attached to the roof, the crew then starts installing the piping between the collector and the pool pump. |
 |
The installer lays out the large piping run and then installs pipe straps that serve as anchors for the feed and return piping. |
 |
The installer maintains clean lines for the piping run which often must follow the various layouts of the roof between the collectors and the pool pump area. |
 |
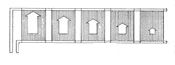
The same amount of water should pass through each collector in the array. Therefore, the feed and return lines leading to each collector should be approximately the same length. This often requires extra piping but the improved collector performance compensates for the additional cost. |
 |
This illustration, and the presented installation, uses a very effective plumbing strategy. The length of the water path is the same for all collectors, so the flow is evenly distributed. Click here for a larger view. |
 |
The plumbing in this illustration reveals a less efficient strategy where the flow tends to be short-circuited through the first few collectors and those at the end are starved for flow resulting in reduced performance. Click here for a larger view. |
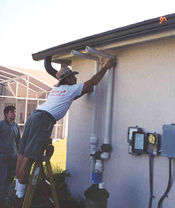 |
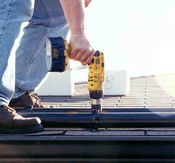
The contractor carefully installs collector feed and return piping that will be connected to the piping coming from the collectors. Note that the piping on the roof is black while the piping running up the wall is white. Black piping will gather heat while the white piping provides a measure of aesthetics. |
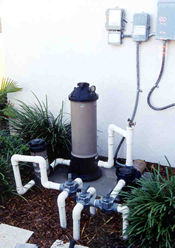 |
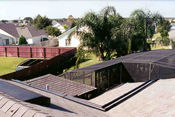
This photograph shows the swimming pool system piping strategy before any of the solar plumbing and valves were installed. Compare this with the next photograph. |
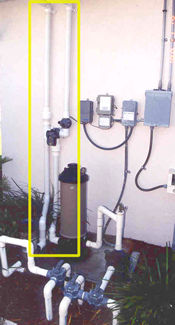 |
As indicated within the yellow borders, only minor changes were made to the original pool system plumbing. The solar installer plumbed into the original piping right after the canister filter and plumbed up to the roof and solar collectors. Position mouse over picture for a close-up view. The piping run along the wall also includes the automatic flow diverter valve, isolation valve, and check valve that will be discussed in the following sections. |
© 2007-2014 University of Central Florida. The Florida Solar Energy Center (FSEC)
is a research institute of the
University of Central Florida.
For more information about FSEC, please contact us or learn more about us.
Find us on Facebook!